

EV Charger Installation in Seattle: How to Prep Your Garage for a Level 2 Charging Station
Category: Uncategorized
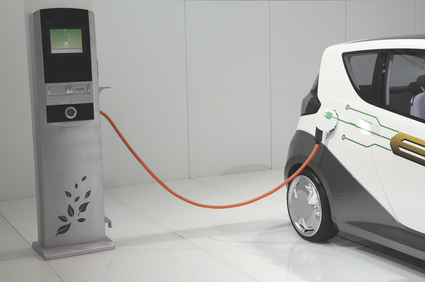 If you are planning EV charger installation in Seattle at your house or condo, a little prep makes the job smoother, faster, and safer. This guide walks Seattle homeowners through the key steps to get a garage or parking spot ready for a dedicated Level 2 charger. It focuses on practical, infrastructure-first planning and the permit path so your project moves from idea to inspection without surprises.
For a deeper look at the installation process itself, explore our level 2 car charging station installation service page after you read this checklist.
What a Level 2 Charger Needs in a Seattle Garage
A Level 2 home charger runs on a dedicated 240‑volt circuit. Your licensed electrician will confirm the right breaker size, wire type, and mounting location based on your EV, driving routine, and where you park. In dense neighborhoods like Capitol Hill, Ballard, and Queen Anne, space and routing often drive the plan more than the charger brand.
- A dedicated 240V circuit sized for continuous load
- Room on your main panel or an appropriate subpanel
- A safe mounting surface within easy reach of your parking spot
- A clean conduit path from panel to charger, indoors or weather-rated outdoors
Use a dedicated 240‑volt circuit rather than sharing with other loads. This keeps charging steady and helps protect your home’s wiring.
Step 1: Map Your Parking And Panel
Start by noting where your breaker panel is and where the car actually sits when you plug in. In many Seattle homes, the panel sits in a basement or utility room while the parking is in a tight garage, a carport off the alley, or a stall in a shared garage.
Measure the practical route. Short, direct runs are ideal. If your charger needs to reach a detached garage in Ballard or a carport off a Queen Anne alley, your electrician may recommend an exterior surface conduit or an underground run to keep the route protected and code compliant. The chosen path should avoid sharp turns, mechanical damage, and busy walkways.
Step 2: Confirm Panel Capacity For A Dedicated 240V Circuit
Your electrician will perform a load calculation to see if your panel can safely support the new circuit. Older Seattle homes sometimes have limited space or smaller services. If the panel is full or undersized, your installer may suggest a subpanel or a full upgrade so the charger does not compete with major appliances.
If you are already planning other upgrades, ask about sequencing. Many homeowners combine EV work with panel upgrades so everything runs on a balanced system and future projects are easier to add.
Do not oversize the charger without a proper load calculation. The right fit is the one that matches your home’s available capacity and your daily miles, not just the biggest number on the box.
Step 3: Choose The Hardware And Mounting Location
Most Level 2 chargers offer adjustable amperage and smart features. Your electrician will help you pick a unit that fits your panel capacity and your parking layout. In a Capitol Hill condo stall, a compact hardwired unit close to the parking bumper reduces cord stretch. In a West Seattle single‑family garage, a side wall mount near the car’s charge port keeps plugging in simple.
If you are comparing amp settings before install day, this quick read can help: 30a vs 40a vs 50a chargers. Use it to discuss options with your installer and settle on the setting that fits your routine.
Step 4: Permits, HOA, And Scheduling In Seattle
Most Level 2 installations require an electrical permit and a final inspection. Your licensed electrician will pull the permit and schedule inspections. If you live in a condo or townhome, loop in your HOA or building manager early so access to the electrical room, garage, or meter area is lined up on install and inspection days.
In shared garages, talk with neighbors or property managers about cord routing and signage. Clear expectations now prevent blocked chargers and tripping hazards later.
Schedule inspection before any walls or ceilings are closed so required components remain visible. Your electrician will coordinate the timing.
Step 5: Plan The Cable Route And Charger Reach
Good route planning means fewer surprises. Your installer will trace the conduit path and check for framing, finishes, or landscaping that could slow the job. For detached garages common in Ballard and parts of North Seattle, expect a straight surface conduit along a fence line or an underground path if that is safer for traffic and weather.
Stand by your parked car and picture the plug‑in motion. The cable should reach the port without dragging on the floor or across walk paths. If two drivers share one charger, a centered location or a mount near the garage door can make life easier.
Step 6: Prep The Space Before Install Day
Help your crew work safely and efficiently by clearing the work zones and confirming access. The small things matter in tight Seattle garages and alleys.
- Clear 3–4 feet around the panel and the charger wall
- Move storage bins, bikes, and garden tools out of the route
- Park so the installer can test cable reach with your vehicle
- Share gate codes or parking instructions for alleys and shared garages
Avoid extension cords or adapters for routine charging. They are not designed for continuous EV loads and can overheat.
Seattle’s cool, wet seasons can slow charging at the start of a session while the battery warms. Mount the charger where water drips and puddles will not collect, and keep the cord off the floor to protect the connector in rainy months.
A simple habit helps: coil the cord on its hook after each use so it stays clean and easy to reach on dark winter mornings.
Step 7: Think Ahead For Future Loads
Many homeowners add a second EV later. If that is on your horizon, ask about load sharing, a subpanel location that keeps options open, or a conduit path sized for another circuit. Planning now costs less than redoing finished walls later.
If you expect a kitchen remodel or heat pump project in the next year or two, mention it during your site visit. Your electrician can suggest a layout that supports both without crowding the panel.
Step 8: Installation Day And Testing
On install day, your licensed electrician will mount the charger, run and secure conduit, pull new conductors, land the circuit at the panel, and label everything. After energizing the circuit, they will test with your vehicle and confirm the charging app or onboard settings. Expect a brief walk‑through so you know how to start and stop a session and what indicator lights mean.
When scheduling allows, your installer will arrange inspection soon after work is complete. Keep the charger accessible and make sure vehicles are parked so the inspector can see the route and labeling clearly.
Notes For Capitol Hill, Ballard, And Queen Anne
Older housing and tighter lots shape EV plans in these neighborhoods. Capitol Hill condos often need coordination for access to electrical rooms and consistent labeling in shared areas. Ballard’s detached garages and alley parking favor clean surface conduit with tight turn radii and clear headroom. Queen Anne slopes and limited driveway depth make charger placement even more important so the cord reaches without crossing walk paths.
In all three areas, a short, direct run with clear labeling is usually the winning plan. Your installer will prioritize a route that protects the conductors from weather and day‑to‑day bumps.
When To Loop In Your Electrician
As soon as you decide where the car will park each night, book a site visit. The walk‑through answers three questions fast: can the panel handle a new 240V circuit, what is the best route, and where should the charger mount for easy, safe use. If you want a preview of charger sizing before that visit, read our quick guide on 30a vs 40a vs 50a chargers and bring your questions.
Ready to move forward or want help comparing hardware and layouts? Browse our Seattle car charging station service overview, then schedule your on‑site assessment with Seattle Electricians Today.
Get Your Seattle Garage EV‑Ready
When you partner with Seattle Electricians Today, a licensed electrician handles your load calculation, routing, permit, installation, and final inspection. That means your charger is installed to code and ready for everyday use, rain or shine. To get started, call 206-937-8495 or book online. If you are still comparing options for EV charger installation in Seattle, our team can help you choose the right setup and timing.
Want the full picture on installation steps and what we include? Visit our car charging station page for more details and next steps.